


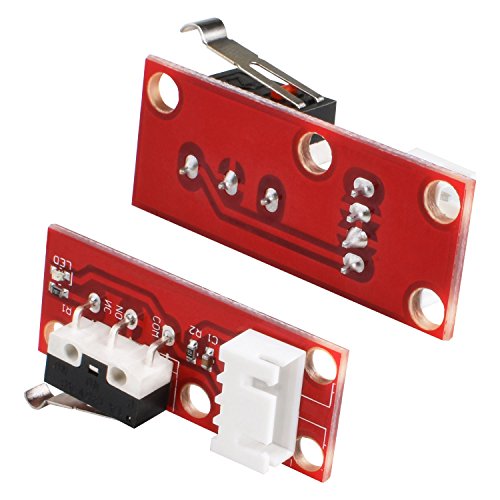


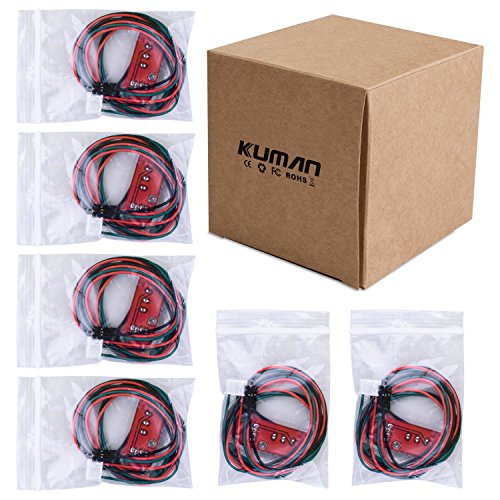
Color:6pcs Mechanical Endstop Switch Connection description: Red line connect VCC (ramps of +) black wire connect the GND (ramps of -) Green Line connect SIGNAL (ramps in s) Tips: Under normal circumstances, the system must be configured to atleast three mechanical switches. Advantage: Easy to install, the more common used styles Length of Cable: 70 cm Package include: 6 x Mechanical Switch Endstop 6 x 3Pin 70cm Cable
M**P
Worth the trouble
EDIT: 9/25 - I have been talking to Kuman for the past few days, and they are making a solid effort to provide some documentation and software on the product. I found something that said v3.00 was designed for grbl 0.8, and that 0.9 changed the end stop setups - which I suspect is the issue I am running into with those. I'll update this as I learn more, and after working with Kuman.ORIGINAL: Basically no manual or other documentation from the manufacturer. The board appears to be a genuine shield, but it's version 3.00, while 3.02 came out pretty quickly after this was released, and 3.51 is the current version, at the time of writing this. It wouldn't be so bad if Kuman included instructions, but the documentation online is rather sparse for 3.00, and it's taking a lot of trial and error to get mine working. For instance if I wire the endstops as is suggested for these, hitting one turns the entire rig off. Pulling the +5v, which appears to only kill the led on trigger gets rid of the shut down, but, the switch does nothing now. 3.02 added a jumper to change the behavior of the switches, and it's not clear how that affects the wiring.Three end stops is annoying .. if you want switches on both ends you have to get another 3, or do something tricky with a cam/lever to actuate. (EDIT 9\25: this may be somewhat standard, I'm new to CNC - but - I think I read they often only run them on one end, perhaps the - direction?)No jumpers to configure things on the cnc shield is also annoying.All of that said -- I'm close to having a fully functional, if a bit rough, cnc for around $250, and this kit is a big part of that.
R**R
Easy to use stepper control. Works fine.
Received the kit in good time and it works well. Arduino does not come with GRBL loaded so you have to get that yourself.All the pins are marked on the board, some on the stepper drivers themselves, so connecting higher amperage remote drivers is easy. I did not need the little drivers included in the kit. Not marked is the probe input, which should be A5.Note that the limit switches are the same pin connections for X+ and X-, Y+ and Y-, and Z+ and Z- (total of three arduino inputs) so you have to set the GRBL code for dual switches in parallel.Also Arduino GRBL only supports three axis control, and the board A output can only be slaved to one of the X, Y, or Z step and dir outputs. There is only one enable pin so it is shared, if you use it at all. You don't need it for basic control of steppers.I had odd behavior of the driver RUN led when +5 was connected in common with the EN driver input. Removing it and having +5 only connected to the STEP and DIR inputs cleared it up.Strang behavior of stepper motors when they were laying on the bench free and trying to run, sometimes it would stop mid run but cleared up when holding (restraining ) the motor. I assume it has something to do with the motor frame kicking back instead of turning the rotor. Don't condemn the drivers if you see this quirk.The touch screen can't be used together with the control board mounted on the Arduino. You'll use a PC or laptop instead of the screen anyway.I heard the usb controller chip might need a firmware update to fix some response errors, but that is a generic Arduino problem when running GRBL.In the end the control board is like a breakout board when you don't use the included driver chips, but that is invaluable for knowing which pins are which.Update 1/3/18 I got the touch screen working on a spare Arduino.
A**R
Improved CNC Shield
This is a really nice upgrade to my existing 3 axis arduino CNC, as it adds end-stops, facilitating auto-home and tool-crash protection. A must have.
F**Z
Quality good, need better instructions, then a again is marketed as profesional item
The overall quality of the kit is above average, had to difficulties location the instructions on seller web page, wrote to them and got a fast response.I had some issues setting up the system following the instructions but finally made the system work, basically my own mistake but it took a lot of YouTube and google search to competed, so a better instruction would help a lot.Another area for improvement is to used physical stops for the Vref potentiometer is difficult to set the reference voltage initially
A**R
Five Stars
Quality parts sould order again for next project
K**U
These mechanical switches worked out great with my controller
These mechanical switches worked out great with my controller. You can use the green and black wires as normally to read the status of the end stop, or you can supply power to the red wire and have a LED light that comes on when the end stop is activated. I'm building another 3D printer and the forum recommended using this end stop switches. They are very good and add a LED feature that helps when trouble shooting. It seems to be a well-established design and many CNC and 3D printers already have the profile to set them in.
R**L
Good Product, however the screen cant be places on ...
Good Product, however the screen cant be places on top of the GRBL module as there is no headers for it, nor does GRBL currently support it.
A**N
Almost complete kit
Grate kit has all you see but requires a 24 volt power supply to complete
Trustpilot
3 weeks ago
2 weeks ago
